For this month's Daring Bakers challenge host is Dolores of Chronicles of Culinary Curiosity, her assistants are Alex (Brownie) of the Blondie and Brownie duo, Jenny of Foray into Food and Natalie of Gluten-a-Go-Go.
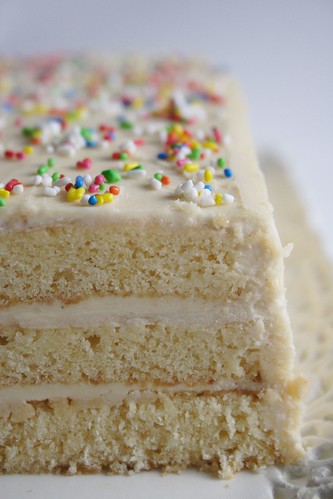
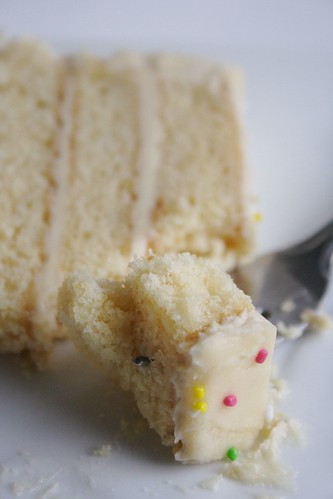
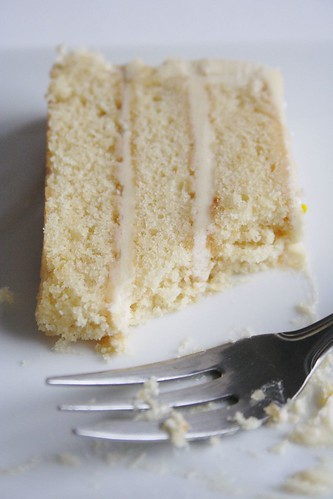
CARAMEL CAKE WITH CARAMELIZED BUTTER FROSTING
(recipe courtesy of Shuna Fish Lydon of Eggbeater)
Caramel syrup:
2 cups sugar
1/2 cup water
1 cup water (for stopping the caramelization process)
For safety reasons, have ready a bowl of ice water to plunge your hands into if any caramel should land on your skin.
In a small stainless steel saucepan, with tall sides, mix water and sugar until mixture feels like wet sand. Brush down any stray sugar crystals with wet pastry brush. Turn on heat to highest flame. Cook until smoking slightly: dark amber.
When color is achieved, very carefully pour in one cup of water. Caramel will jump and sputter about! It is very dangerous, so have long sleeves on and be prepared to step back.
Whisk over medium heat until it has reduced slightly and feels sticky between two fingers. Wait for it to cool on a spoon before touching it!
Biscuit:
10 Tbsp unsalted butter at room temperature
1 1/4 cups granulated sugar
1/2 tsp salt
1/3 cup caramel syrup (recipe above)
2 eggs, at room temperature
2 cups flour
1/2 tsp baking powder
1 cup milk, at room temperature
Preheat oven to 350F
Butter one tall (2 – 2.5 inch deep) 9-inch cake pan.
In the bowl of a stand mixer fitted with a paddle attachment, cream butter until smooth. Add sugar and salt and cream until light and fluffy.
Slowly pour room temperature caramel syrup into bowl. Scrape down bowl and increase speed. Add eggs/vanilla extract a little at a time, mixing well after each addition. Scrape down bowl again, beat mixture until light and uniform.
Sift flour and baking powder.
Turn mixer to lowest speed, and add one third of the dry ingredients. When incorporated, add half of the milk, a little at a time. Add another third of the dry ingredients, then the other half of the milk and finish with the dry ingredients.
Take off mixer and by hand, use a spatula to do a few last folds, making sure batter is uniform. Turn batter into prepared cake pan.
Place cake pan on cookie sheet or 1/2 sheet pan. Set first timer for 30 minutes, rotate pan and set timer for another 15-20 minutes. Your own oven will set the pace. Bake until sides pull away from the pan and skewer inserted in middle comes out clean. Cool cake completely before icing it.
Caramelized butter frosting:
12 Tbsp unsalted butter
1 pound confectioner’s sugar, sifted
4-6 Tbsp heavy cream
2 tsp vanilla extract
2-4 Tbsp caramel syrup (recipe above)
kosher or sea salt to taste
Cook butter until brown. Pour through a fine meshed sieve into a heatproof bowl, set aside to cool.
Pour cooled brown butter into mixer bowl.
In a stand mixer fitted with a paddle or whisk attachment, add confectioner's sugar a little at a time. When mixture looks too chunky to take any more, add a bit of cream and or caramel syrup. Repeat until mixture looks smooth and all confectioner's sugar has been incorporated. Add salt to taste.
Notes and adaptations: I baked biscuit in a 40x35 cm baking pan so I cut the baking time to 10 + 10 minutes. I loved the biscuit and will probably make it again, but the frosting was way too sweet. Although I added only 230 g (out of 450 g = 1 pound!) it was still too much.
Shuna's notes on making the cake.
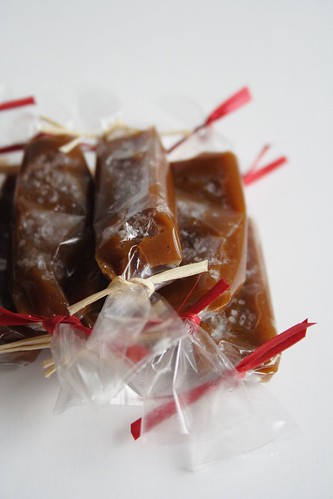
GOLDEN VANILLA BEAN CARAMELS
(recipe from Alice Medrich's Pure Dessert)
1 cup golden syrup
2 cups sugar
3/8 tsp fine sea salt
2 cups heavy cream
1 1/2 tsp pure ground vanilla beans, purchased or ground in a coffee or spice grinders, or 1 Tbsp plus 1 tsp pure vanilla extract
3 Tbsp unsalted butter, cut into chunks, softened
Line the bottom and sides of the baking pan with aluminum foil and grease the foil. Combine the golden syrup, sugar, and salt in a heavy 3-quart saucepan and cook over medium heat, stirring with a silicone spatula or wooden spoon, until the mixture begins to simmer around the edges. Wash the sugar and syrup from the sides of the pan with a pastry brush dipped in water. Cover and cook for about 3 minutes. Meanwhile, rinse the spatula or spoon before using it again later. Uncover the pan and wash down the sides once more. Attach the candy thermometer to the pan, without letting it touch the bottom of the pan, and cook, uncovered (without stirring) until the mixture reaches 305°F. Meanwhile, combine the cream and ground vanilla beans (not the extract) in a small saucepan and heat until tiny bubbles form around the edges of the pan. Turn off the heat and cover the pan to keep the cream hot.
When the sugar mixture reaches 305°F, turn off the heat and stir in the butter chunks. Gradually stir in the hot cream; it will bubble up and steam dramatically, so be careful. Turn the burner back on and adjust it so that the mixture boils energetically but not violently. Stir until any thickened syrup at the bottom of the pan is dissolved and the mixture is smooth. Continue to cook, stirring occasionally, to about 245°F. Then cook, stirring constantly, to 260°F for soft, chewy caramels or 265°F for firmer chewy caramels.
Remove the pan from the heat and stir in the vanilla extract, if using it. Pour the caramel into the lined pan. Let set for 4 to 5 hours, or overnight until firm.
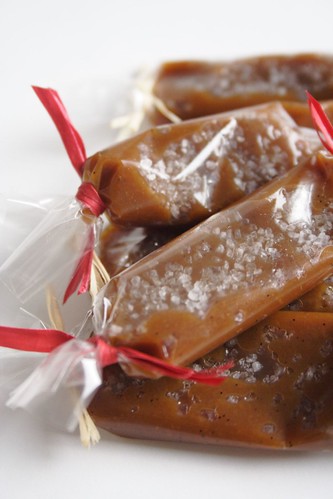
Lift the pan liner from the pan and invert the sheet of caramel onto a sheet of parchment paper. Peel off the liner. Cut the caramels with an oiled knife. Wrap each caramel individually in wax paper or cellophane.
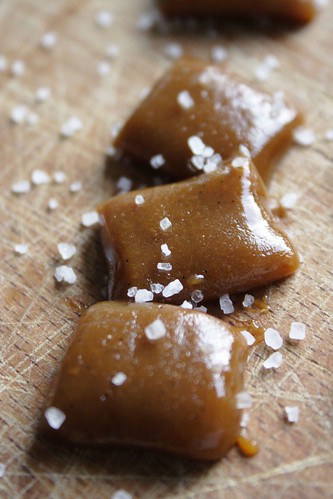
For the Fleur de Sel Caramels: Extra salt, in the form of fleur de sel or another coarse flaked salt, brings out the flavor of the caramel and offers a little ying to the yang. Add an extra scant 1/4 teaspoon of coarse sea salt to the recipe. Or, to keep the salt crunchy, let the caramel cool and firm. Then sprinkle with two pinches of flaky salt and press it in. Invert, remove the pan liner, sprinkle with more salt. Then cut and wrap the caramels in wax paper or cellophane.
Notes and adaptations: There is no golden syrup here in Serbia so I used green pine needles syrup. They turned fabulously chewy which was kind of unexpected for me, considering that I don't have a candy thermometer and had to do everything approximately.
What a pretty cake and beautiful caramels! Very well done!
ReplyDeleteCheers,
Rosa
The sprinkles on your cake make it look very festive. My daughter would love it.
ReplyDeleteI too, made caramels without the thermometer.
Beautiful cake and lovely caramels! Neat photos too:)
ReplyDeleteWow your cake and caramels look delicious!!
ReplyDeleteYour cake looks great. It's much lighter then mine. Mine turned out quite dence. Caramels look great too!!! :)
ReplyDeleteLooks very good! I'm a big supporter of salt and sugar and you seem to have pulled it off well.
ReplyDeleteYour cake look gorgeous! For me it was too sweet, too. ;-)
ReplyDeleteYour cake looks exquisite Marija...love the caramels too! I bought a candy thermometer especially for the challenge, but couldn't find time to make the caramels...life is!!!
ReplyDeleteCheers Deeba
Great cake! I love how you've wrapped the caramels. Looks beautiful.
ReplyDeleteOh, how pretty! I'm sorry to hear that the frosting was too sweet for you, though.
ReplyDeleteThat final picture of your caramels with the salt is just incredible!!
you went all out making both recipes too. fabulous!
ReplyDeletelove the tiny sprinkles...the cake looks wonderful!!
ReplyDeleteYour cake is beautiful! I love how light it looks.
ReplyDeletelove the hundreds and thousands on your cake. it looks so yummi! I too thought that the frosting was too sweet. I'm definitly going to make the cake again but without the frosting. your caramels look just the way they should...:)
ReplyDeleteEverything looks wonderful. Green pine syrup sounds so intriguing. Great job!
ReplyDeleteI saw the caramels on food gawker and I was immediately drawn to them. Fabulous cake and caramels!
ReplyDeletepredivno izgleda...
ReplyDeleteGreen pine needle syrup? Too neat! And I'm instantly mesmerized by the sprinkles :)
ReplyDeleteDecadent cake with creamy layers,bet the caramels would be perfect treat for the holiday season.
ReplyDeleteReally well done - I especially liked that you rescheduled the process since you're right, you make the caramel syrup first. I was a little confused by that in the beginning.
ReplyDeletec'est vraiment superbes et tes photos sont magnifiques :)
ReplyDeleteLovely cake and caramels.
ReplyDeleteI LOVE how you cake looks like :-)!!! GREAT!!!!
ReplyDeleteWhat a pretty cake you have there. I love those sprinkles...
ReplyDeleteWell done on this month challenge.
You did a beautiful job with this month's challenge. Thanks for baking with us.
ReplyDeleteReally nicely done... You make splitting cakes into perfectly even layers seem so easy.
ReplyDeleteGood job on the caramels without a termomether! And the cake is gorgeous too, I liked the sprikles!
ReplyDeleteIt is a mystery to me, how you got everything: the cake and the buttercream to stay so pale!
ReplyDeleteIt gives a wonderful feel of delicate softness to the result!
Amazing!
I love the layers and the non-pareils! Very pretty and your caramels are perfect!
ReplyDeleteI've never heard of green pine needles syrup, but your caramels look delicious! Sounds like an intriguing flavor. Your cake looks perfect!
ReplyDeleteBeautiful caramels! Mine ended up as toffee. (even with the thermometer!) Great job.
ReplyDeleteWow both your cake and caramels look so delicious. Love what you've done.
ReplyDeleteYour cake and caramels are so lovely!!
ReplyDeletetorta izgleda famozno...a karamele mi se posebno sviđaju...nedavno sam imala neuspjeli pokušaj izrade domaćih karamela, jer nemam onaj termometar pa sam ih prekratko kuhala pa su i nakon hlađenja bile relativno tekuće :) ali ove tvoje me mame da ponovo pokšam :)
ReplyDeleteNice photos! I love your caramels, they are adorable =)
ReplyDeleteI love how pretty your cake looks with the sprinkles it really makes it look cheerful. Good job on the caramels too.
ReplyDeleteBeautiful Job!
ReplyDeleteMarija, perfection as usual! Great job on the cake and caramels! So beautiful!
ReplyDeletethis a gorgeous looking cake marija! love those caramel!
ReplyDeleteYou are really talented Marija! I love your rendition for the cake and caramel! lovely lovely!
ReplyDeletethe sprinkles add that little punch of pizazz, awesome! everyone did such a good job on their caramels, yours look wonderfully delicious, i am feeling inspired to try to make them!
ReplyDeleteI love the caramel candies! It's gorgeous and looks delicious.
ReplyDeletethe cake looks delicious and its really pretty decorated :)
ReplyDeleteYour caramels turned out beautifully - looks like you didn't need a thermometer after all!
ReplyDeleteGreat job! your cake was layered very nicely! Salted caramels look delicious as well.
ReplyDeleteSo, so pretty.
ReplyDeleteWow, your photography is beautiful!
ReplyDeleteGorgeous as usual ^_^ Your caramels look very good too!
ReplyDeleteLove how youve layered it, it looks really different to how other Daring Bakers looks! Well done.
ReplyDeleteSuch lovely layers you have there! And your caramels look flawless; what a sweet treat they must have been!
ReplyDeleteWow, Your cake looks greats.
ReplyDeleteAnd the caramel looks delicious too, So sad I didn't have enough to make it.
Marija, how beautiful your cake is! It's so christmasy! Lovely!
ReplyDeletei just saw these being made by ina garten (who, i can not stand and do not think is all that great) and i'm kind of excited to see that maybe she took that recipe from the one you have here! i thought ina was creative w/ that one, but now it seems like she just took it from somewhere.
ReplyDeleteregardless of where it comes from, i love this! they are elegant and look delicious.